
In this article, we connect an KY-018 Photoresistor or LDR to a Raspberry Pi Pico 2, any rp2350 type board will be suitable.
There are many good ones, I actually used a Pimoroni one as it was on hand
Overview
We will use Micropython for these examples but of course you can use the Arduino IDE as well if you have Raspberry Pi Pico support enabled
A photoresistor, also known as a light-dependent resistor (LDR), is a type of passive electronic component whose resistance decreases as the intensity of light falling on it increases. This phenomenon makes photoresistors ideal for sensing light levels.
They are typically made of semiconductor materials, such as cadmium sulfide (CdS), which exhibit photoconductivity — a property where the conductivity of a material increases with light exposure.
Photoresistors are commonly used in applications where detecting ambient light levels is necessary. For instance, they are used in automatic streetlights, which turn on when it gets dark, and in electronic devices like light meters, alarm systems, and nightlights.
While photoresistors are cost-effective and simple to use, they have limitations, such as slow response times and reduced sensitivity to certain wavelengths of light. Moreover, the use of cadmium-based photoresistors is regulated in some regions due to environmental concerns, leading to the adoption of alternative light sensors in modern designs.
The sensor looks like this
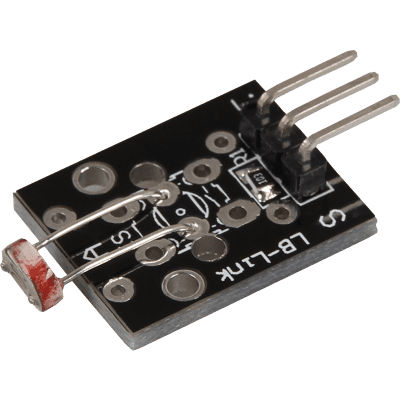
The resistance will decrease in the presence of light and increase in the absence of it. The output is analog and determines the intensity of light.
The module consists of a photoresistor, a 10 k in-line resistor and header.
This resistance can be determined using a basic voltage divider, where a known voltage is divided across the 10k resistor and the unknown resistance from the LDR. Using this measured voltage, the resistance can then be calculated. This is the basic idea
Parts Required
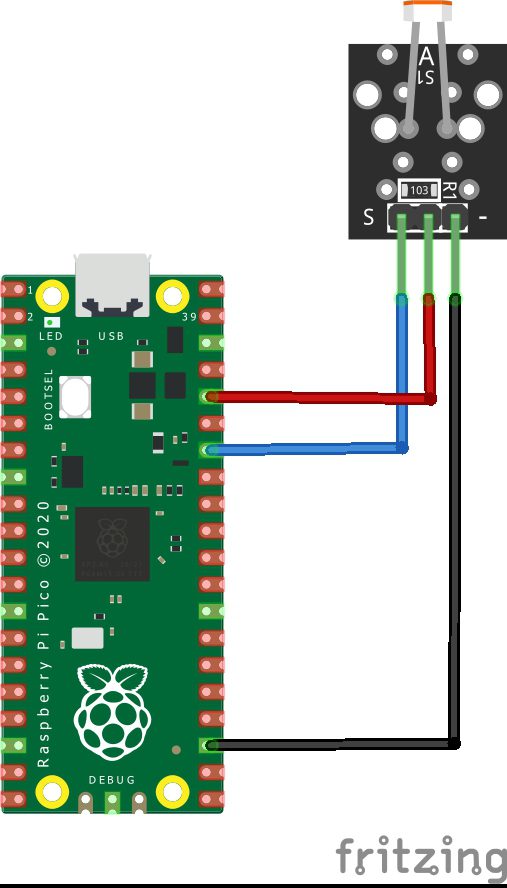
You can connect to the module using dupont style jumper wire.
| Name | Link |
| Raspberry Pi Pico 2 | |
| 37 in one sensor kit | |
| Connecting cables |
Schematic/Connection
| Pico | SENSOR |
|---|---|
| GPIO28 | S |
| 3.3v | middle pin |
| GND | – |
The part I had was Pico but the pinout for a Pico 2 is the same – so this works just fine
Code Example
Basic example in thonny
from machine import Pin
import time


class LDR:
    def __init__(self, pin):
        self.ldr_pin = machine.ADC(Pin(pin))

    def get_raw_value(self):
        return self.ldr_pin.read_u16()

    def get_light_percentage(self):
        return round(self.get_raw_value()/65535*100,2)

ldr = LDR(28)

while True:
     print(ldr.get_light_percentage())
     time.sleep(1)
REPL Output
Run -c $EDITOR_CONTENT
31.31
30.99
31.11
57.09
67.28
23.32
14.8
14.55
14.77
13.92
13.68
13.92