
In this article, we connect a KY-020 Tilt switch to a Raspberry Pi Pico 2, any rp2350 type board will be suitable.
There are many good ones, I actually used a Pimoroni one as it was on hand
Overview
We will use Micropython for these examples but of course you can use the Arduino IDE as well if you have Raspberry Pi Pico support enabled
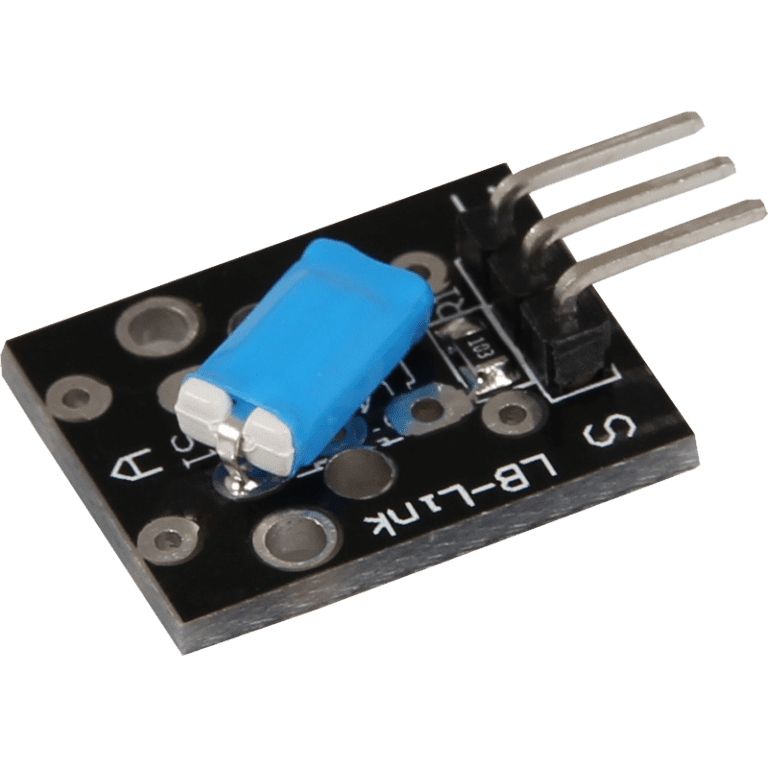
A tilt switch is a simple sensor used to detect orientation or changes in position by measuring tilt or inclination. It typically consists of a conductive ball or liquid inside a sealed casing, along with electrical contacts.
When the switch tilts beyond a certain angle, the conductive material moves and either makes or breaks the electrical connection between the contacts, thereby triggering an on/off signal.
Tilt switches are commonly used in a variety of applications to detect motion or orientation. In household appliances, they may serve as safety features, such as turning off a space heater if it tips over. In toys and games, tilt switches can add interactive elements by detecting movement.
They are also used in industrial and automotive settings to monitor equipment position or trigger alarms if a device moves out of alignment. While tilt switches are inexpensive and simple, modern applications often favor accelerometers or gyroscopes for more precise and multidirectional motion detection.
The sensor looks like this
Parts Required
You can connect to the module using dupont style jumper wire.
| Name | Link |
| Raspberry Pi Pico 2 | |
| 37 in one sensor kit | |
| Connecting cables |
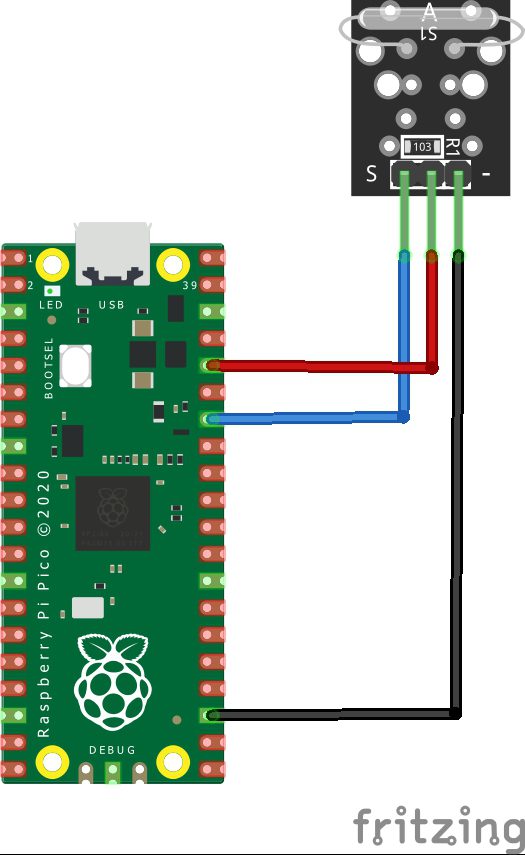
Schematic/Connection
| Pico | SENSOR |
|---|---|
| GPIO28 | S |
| 3v3 | Middle pin |
| GND | – |
The part I had was Pico but the pinout for a Pico 2 is the same – so this works just fine
Code Examples
Basic example
from machine import Pin, Timer

# Initialization of GPIO 28 as input
sensor = Pin(28, Pin.IN, Pin.PULL_DOWN)

# Create timer
timer = Timer()

# Set counter to 0
counter = 0


def tilt(timer):
    global counter
    counter = counter + 1
    print("Tilt detected")
    print(counter)

# Function: debounce
def debounce(pin):
    # Debounce function: Set timer
    timer.init(mode=Timer.ONE_SHOT, period=100, callback=tilt)

# Interrupt
while True:
    sensor.irq(trigger=Pin.IRQ_FALLING, handler=debounce)
REPL Output
Move the switch around
>> %Run -c $EDITOR_CONTENT
Tilt detected
1
Tilt detected
2
Tilt detected
3
Tilt detected
4
Tilt detected
5