
In this article, we connect a KY-021 Mini Magnetic Reed Switch to a Raspberry Pi Pico 2, any rp2350 type board will be suitable.
There are many good ones, I actually used a Pimoroni one as it was on hand
Overview
We will use Micropython for these examples but of course you can use the Arduino IDE as well if you have Raspberry Pi Pico support enabled
A reed switch is an electrical switch operated by a magnetic field. It consists of two thin, ferromagnetic metal reeds sealed within a glass capsule. When a magnetic field is applied near the switch, the reeds are magnetized and either attract each other (closing the circuit) or repel each other (opening the circuit), depending on the design. The glass capsule protects the reeds from environmental damage, making the switch durable and reliable.
Reed switches are commonly used in applications where non-contact operation is essential. For instance, they are widely used in security systems as door and window sensors, detecting when they are opened or closed. They are also found in devices like reed relays, home appliances, and automotive systems, where precise and safe switching is required. Reed switches are valued for their simplicity, low power consumption, and long lifespan, though they are sensitive to vibration and shock, which can affect their reliability in certain environments.
The switch may be actuated by an electromagnetic coil, making a reed relay, or by bringing a permanent magnet near it. When the magnetic field is removed, the contacts in the reed switch return to their original position.
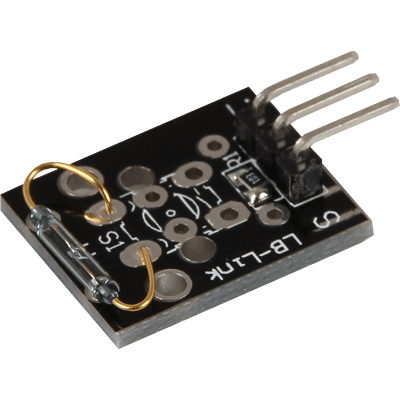
The sensor looks like this
Parts Required
You can connect to the module using dupont style jumper wire.
| Name | Link |
| Raspberry Pi Pico 2 | |
| 37 in one sensor kit | |
| Connecting cables |
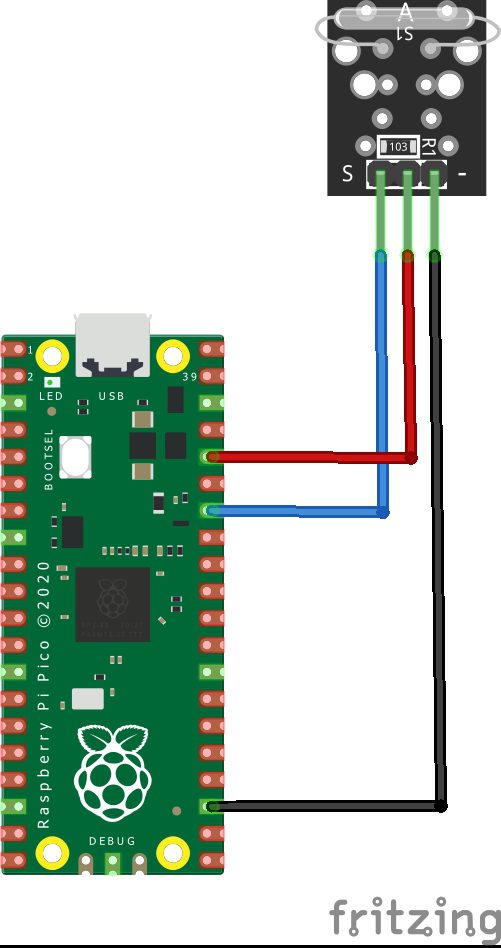
Schematic/Connection
| Pico | SENSOR |
|---|---|
| GPIO28 | S |
| 3v3 | + |
| GND | – |
The part I had was Pico but the pinout for a Pico 2 is the same – so this works just fine
Code Examples
Basic example
from machine import Pin, Timer
from time import sleep

# Initialization of GPIO27 as input
sensor = Pin(28, Pin.IN, Pin.PULL_DOWN)

# Continuous loop for continuous serial output
while True:
    if sensor.value() == 0:
        print("Magnetic field")
    else:
        print("No magnetic field")

    print("---------------------------------------")
    sleep(0.5)
REPL Output
You will need to find a magnetic source and move it close to the sensor
No magnetic field
—————————————
No magnetic field
—————————————
No magnetic field
—————————————
No magnetic field
—————————————
Magnetic field
—————————————
Magnetic field
—————————————
No magnetic field
—————————————